Maintenance: Speedometer Cable Replacement
Disclaimer: Working on vehicles can be dangerous or life threatening. If you are inexperienced, seek the assistance of a professional.
*The Skyline R32's have speedometers that are mechanically driven. There is a cable running from the back of the instrument gauge on the speedometer going through the firewall, down and underneath the car to the transmission. Since the cars are fairly old now, the cable is prone to break. When it breaks, the speedometer will no longer work which in turn will cause your power steering and hicas to stop working as well. This DIY will guide you to replace the cable on your own if you so wish to do so.
Tools needed: 10mm open end wrench or socket/ratchet set; 22mm open end wrench; phillip head screw driver.
Parts needed: New speedo cable (Nissan Part# 25050-05U00 [Shaft Speedomet]
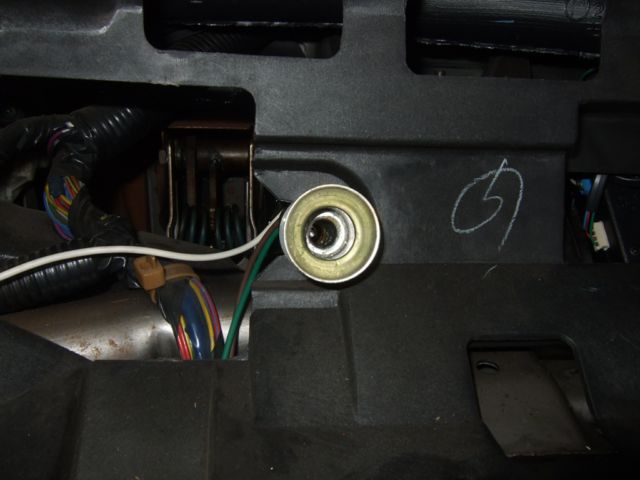
Step1: You'll need to remove the instrument gauge to access the cable end. -Instrument Removal-
Step2: Slide the cable out from the bracket to the left and position it where it will less likely to get snagged as you pull it from under the car later in the step. You can shine a flashlight and follow the cable to see the chute the cable will be sliding through. You can also do what I did by pushing the cable down the chute as much as you can. It won't be a whole lot, but you can feed some.

Step3: Raise the car on a lift or place it on jack stands (the front at a minimum). Also, raise your hood and leave it propped open. You'll find out later why.
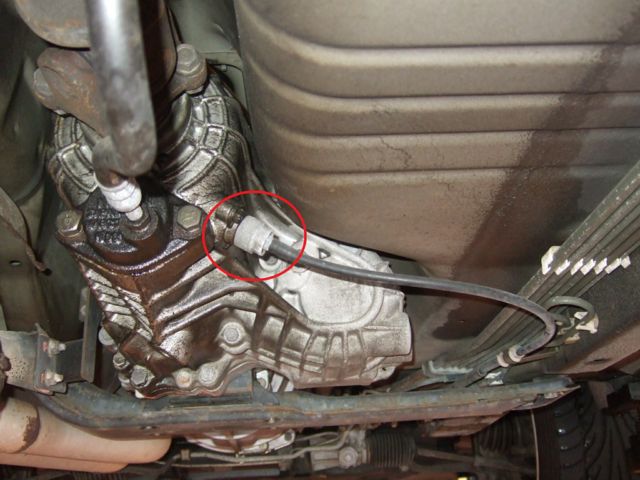
Step4: Start with the cable end attached at the transmission. You should be able to unscrew it by hand, but if it has seized over time, you can use a 22mm open ended wrench to loosen it.
Step5: Remove the cable off all the retaining clips so it's free to move around.
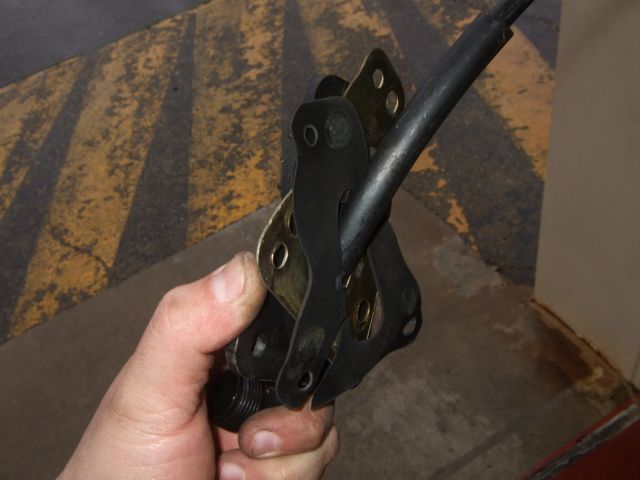
Step6: Remove the 3 (10mm) bolts securing the cable bracket. It's easy to find, just follow the cable from the transmission to the firewall. It's located fairly low on the firewall. Since you have the new replacement cable, you should know how the bracket looks. When you remove the bolts and the bracket is off, be sure that the whole thing is off. There are 3 pieces to the bracket. The plastic, the metal frame, and the foam/rubber gasket. The foam and the metal stuck to the firewall on mine. I used a pry bar to pry it loose.
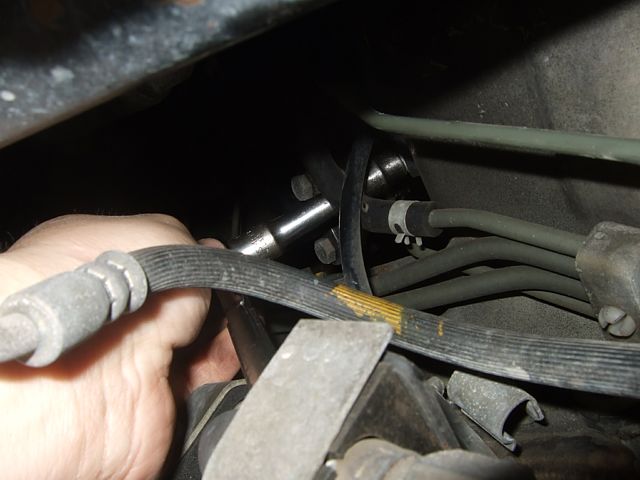
Step7: Pull the cable out (might need to do some jiggling). Once it's out, the easiest way to remove the whole cable assembly is through the top of the engine bay. You should be able to see an access point since you left the hood open. Feed as much or all of the cable out the top while you're still underneath.
Step8: Go to the top of the engine bay and pull the remainder of the cable out (if any), then feed the new cable down the same way.
Step9: When you're reversing the stes to install the new cable. Secure the cable in the dash in the bracket before you start bolting the firewall bracket.
Step10: Reverse all the steps to install the new cable. Remember that the bracket is plastic. Do not over tighten the bolts. Lastly, the cable end that goes to the transmission is protected with a plastic cap. Remove it only when you're ready to attach that end of the cable. There is a groove on the transmission side and you'll see it. If it doesn't line up when you're trying to reinstall the cable, turn the metal on the cable side to match the transmission plug. *Don't over tighten the cap on the transmission*

>>> Home