Maintenance: Brake rotor replacement
Tools needed: Ratchet & socket set, Impact driver (might
be needed)
Parts needed: New rotor
Step1: *In a sense, the rotor replacement is a continuation of
the brake pad replacement, so perform the Brake pad procedures first.
-BRAKE
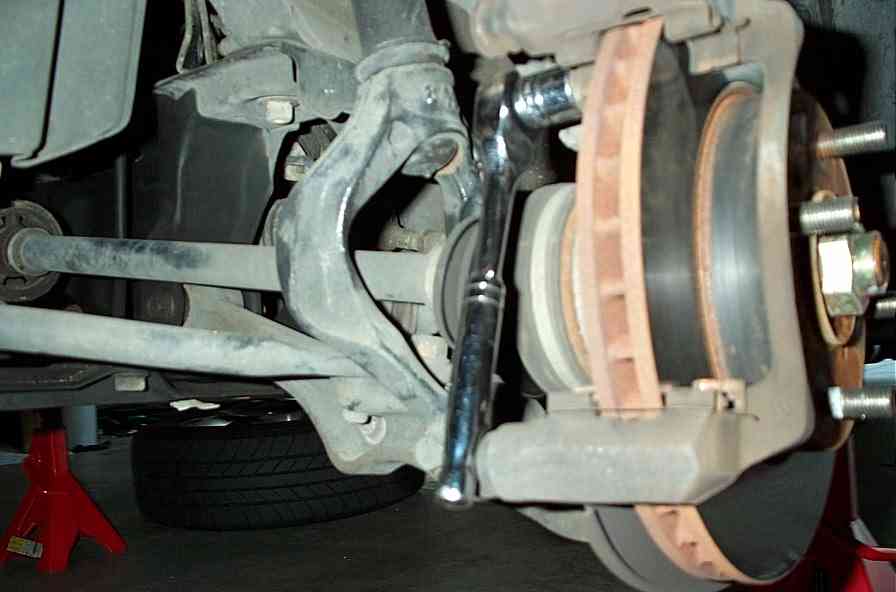
PAD LINK- Follow Steps 1-5
*NOTE: In addition to removing the bottom caliper bolt,
you'll also be removing the top bolt to seperate the caliper all together.
Step2: Remove the 2 bolts holding the caliper bracket in place.
I believe it's a 19mm. It located near the hole for the caliper bolts about an
inch inward.
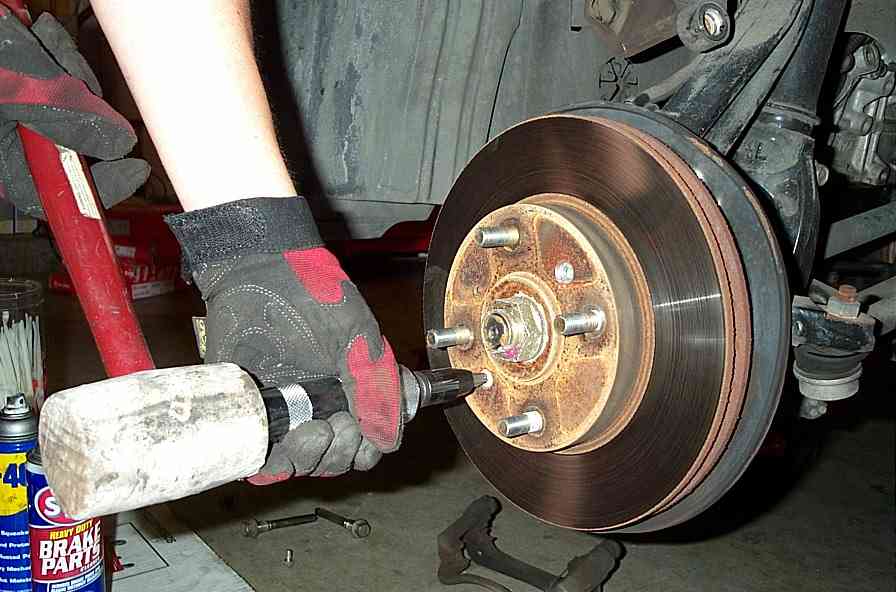
Step3: After removing the caliper bracket, use an impact driver
to remove the 2 screws securing the rotor in place. Some screws won't be seized
where you can use a normal screwdriver, but most will need the impact driver.
Step4: While the rotor is off, it'll be a good idea to clean
the surface area of the hub using brake cleaner.
Step5: Place the new rotor on the hub. Some rotors will have
the holes for the screws in the right place and some will not. If it doesn't,
don't worry. The wheels hold it in place.
Step6: Re-install everything in reverse order. Torque specs:
Caliper bracket(80 ft. lb), Caliper bolts(54 ft. lb), Wheels (80 ft lb., I recommend
86 ft. lb)
Step7: Rear is done the same way. Torque specs: Caliper bracket(41
ft. lb), Top caliper bolt(16 ft. lb), Bottom caliper bolt(18 ft. lb)
Step8: Make sure to pump the brakes once or twice to press the
piston against the pads.
>>> Home