Maintenance: Brake bleeding/flushing
*Brake bleeding and flushing are done in the same fashion.
Brake bleeding is releasing any air that is in your braking system. Not much
fluid is released. Brake flushing is done the same way except you're completely
flushing out the old brake fluid with new one.
**If you're wondering what fluid to use, I would recommend that you stick with
Honda Dot3 brake fluid. If you're planning on running a road course or do
canyon runs frequently, you should consider running high performance DOT4 brake
fluid in conjunction with stainless steel braided brake lines.
Tools needed: 10mm open end wrench.
Parts needed: Clear bottle/container, 1/4" clear
tube (available at Home Depot or OSH, brake fluid, funnel, 2nd person.
Step1: Support the vehicle on jack stands and remove wheels.
Place the wheels under the car between the jack stands as added precaution.
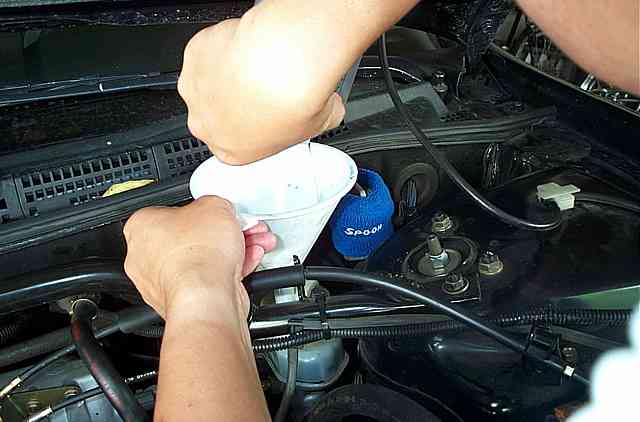
Step2a: (Bleeding) Fill the brake fluid resovoir with brake
fluid to the 'Max' line or almost to the top.
Step2b: (Flushing) Get any form of pump or turkey baster and
remove as much brake fluid as you can from the resovoir. Once completed, fill
the brake fluid resovoir with brake fluid to the 'Max' line or almost to the
top. For those who use high performance brake fluid (DOT 4), ATE makes two brake
fluids. One blue, and the other gold. It makes flushing your system much easier
since you can tell when the system has been completely flushed.
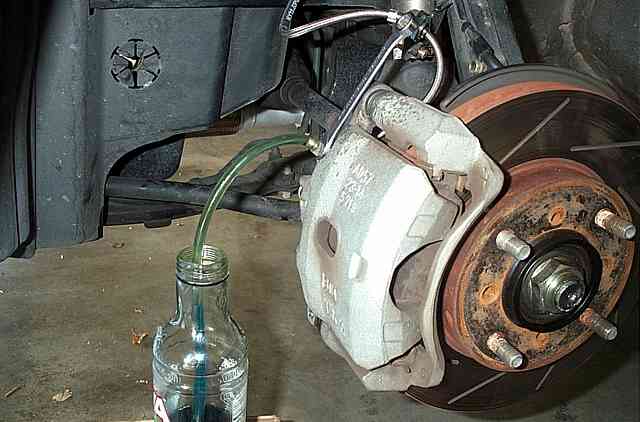
Step3: Start with the driver side front brake. Remove the dust
cap from the bleeder valve. Place one end of the 1/4" clear tube over the
valve opening. Fill the clear bottle with clean brake fluid to about 1 to 2 inches,
and place the other end of the clear tube in the fluid.
Step4: Have the 2nd person pump the brakes until the pedal
is reaches the top then hold a constant pressure on the pedal. Using a 10mm
open end wrench, loosen and open the valve about 90 degrees. Have the 2nd person
let you know when the pedal is almost to the floor, then close the bleeder.
Most people develop a system. The individual pumping the brakes will call out,
'up'; the individual controlling the bleeder will open the valve; when the pedal
is almost to the floor, the guy pressing the pedal will call out, 'down'; the
bleeder guy will then close the valve and call out 'go'; the pedal guy will
pump the brakes back up and the sequence starts over.
*Apply firm pressure on the brake pedal but don't over muscle it or
you can blow a seal.
**For bleeding, I would recommend that you repeat the process about half a dozen
times. For flushing, I would recommend about a dozen times or until you feel
comfortable that the old fluid is completely out.
Brake bleeding sequence: 1) Driver side front, 2) passenger
side front, 3) passenger side rear, 4) driver side rear.
*NOTE: If you changed the brake lines or other upgrade
where air was introduced to the braking system, I highly recommend that
you re-bleed the brakes again after about 2 days of driving.
>>> Home