Spring/Shock/Coilover Installation Guide
Tools/Items needed: Ratchet (2 if possible) and socket set from 12mm-17mm, allen wrenches, open end wrench for the shock bolt, thin masking tape, spring compressor, jack, jackstands.
Step 1: You can choose to jack up one end at a time or support the entire vehicle on jack stands. If you jack up only one side of the vehicle, use jackstands and wheel chokes. **Jack Points**
Step 2: We'll start with the rear. It's best to remove the interior parts first so you don't get the fabrics dirty after handling the suspension parts. Start by removing the rear bench cushion. Reach under the front part of the cushion on either ends and yank up to pop the cushion loose. There are two. Next, there is one bolt holding it down in the back crevice between the 2 seat belt latches.

Step 3: Fold the rear seats down (Place a towel underneath the seat so it doesn't contact the floor directly).
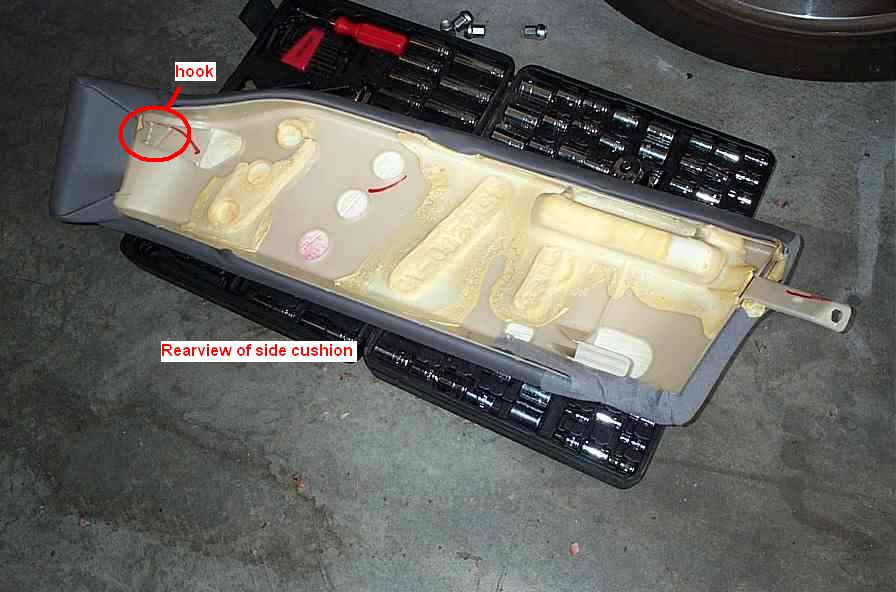
Step 4: Remove the two side cushions on either end. They are held in place by one bolt at the base. Once the bolt is removed, slide the seat cushion up to unlatch the hook.
.
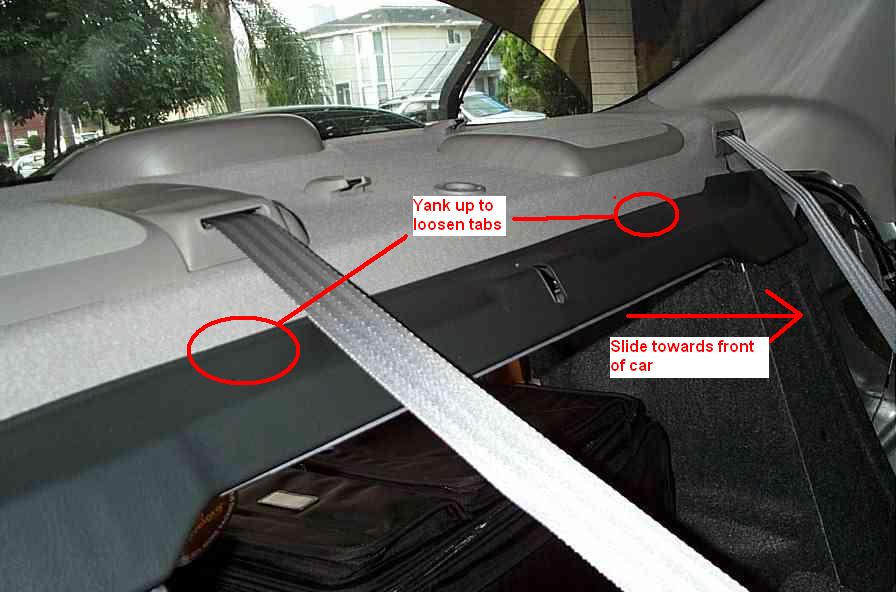
Step 5: Remove the plastic cover to gain access to the top mounts of the shock. The plastic cover is held in place at 4 points. 2 of the points are held by plastic retainers which simply pop out by reaching in the back and tugging upward. They're located about 1/4 way in from each end. Once they are popped out, hold the plastic up and slide it forward towards the front of the car.

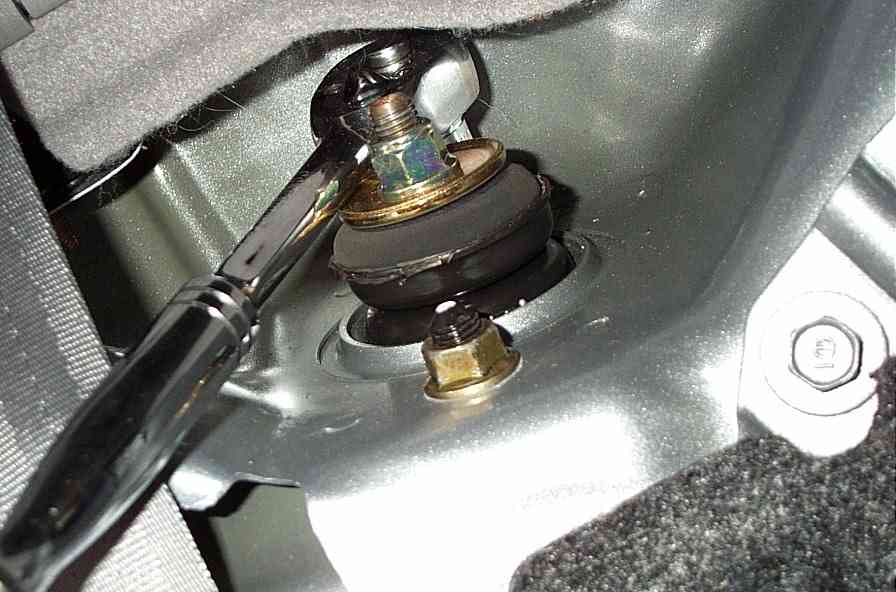
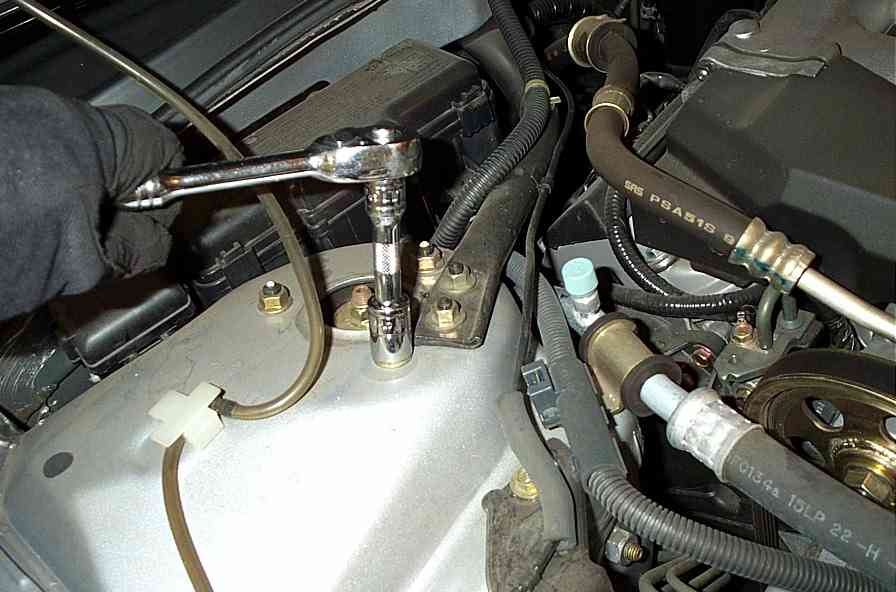
Step 6: Remove the bolts holding the shock in place.
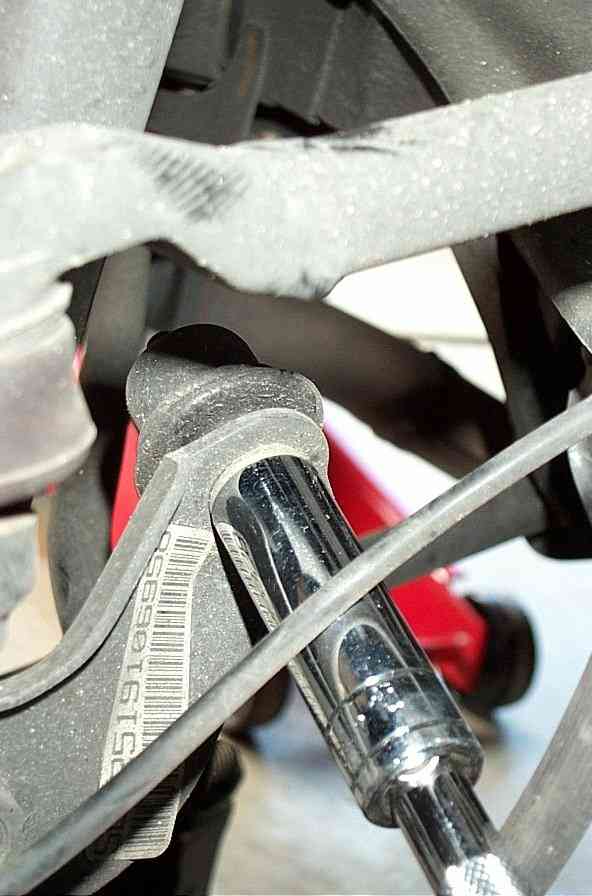
Step 7: Removal of the suspension. 1st, remove the swaybar endlink bolt that's connected to the lower arm. Next remove the bottom bolt of the shock. Carefully remove the suspension (you might need to press down on the control arms) If you have a second person, have him press it down with his foot.
Step 8: Compress the springs using a spring compressor (in many places, auto parts stores offer these tools as loaners). While the springs are adequately compressed, remove the top mount using an open ended wrench and an allen wrench holding the strut rod still. *Keep track of how the washers and other components are placed once the top mount is removed.
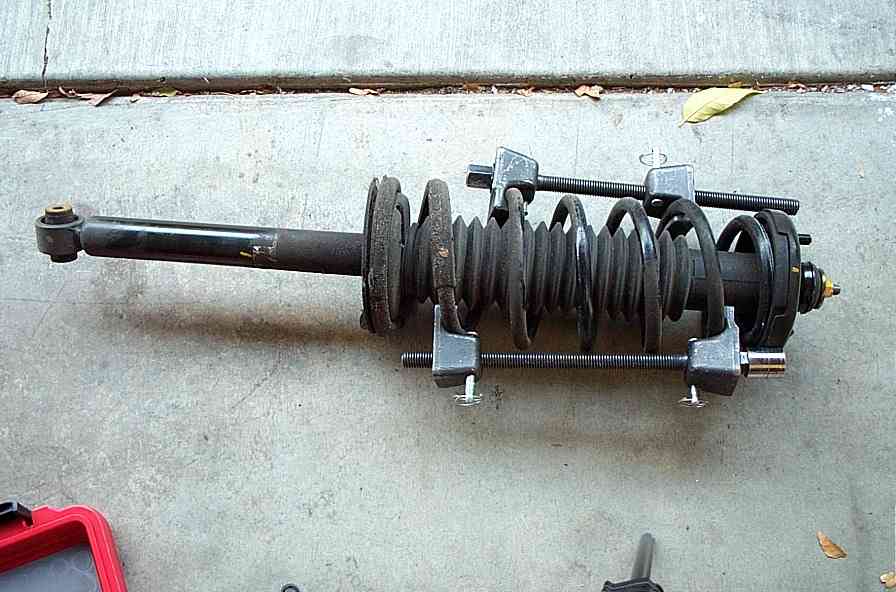
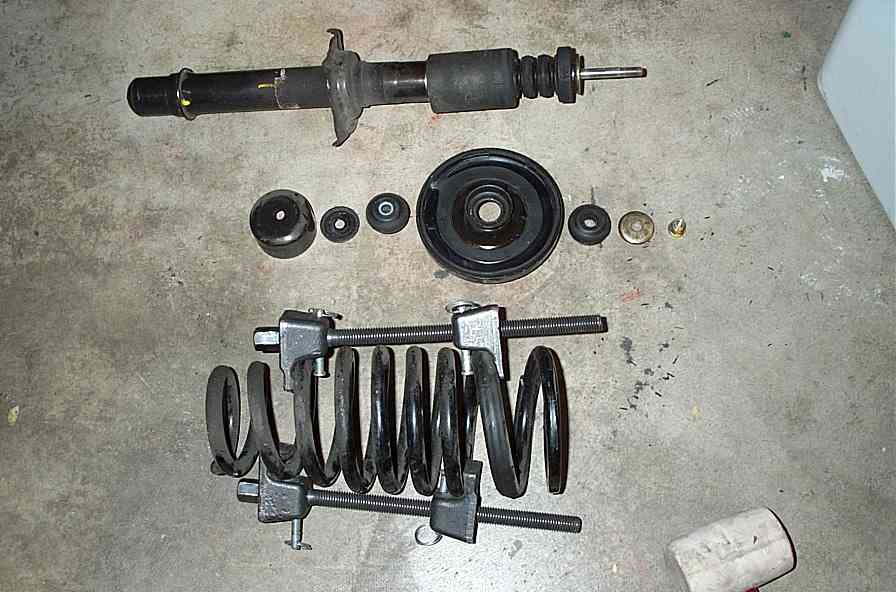
**If you're switching to coilovers, you will only be reusing the top mount unless yours includes one. The pic below are the components of the suspension.
Step 9: If you're reusing the stock bump stop, saw it in half with a hacksaw, knife, etc. When using aftermarket springs, you normally do not need to use a spring compressor. you should be able to put the top mount on and push down on the spring to get the nut back into place. From there you can just tighten the nut. It should be fairly tight, but not to the point where you burst a vein.
Step 10: Reinstall the assembled suspension. Torque specs: bottom shock bolt - 43 ft. lbs.; swaybar endlink - 29 ft. lbs.; top mount bolts - 37 ft. lbs. You should put the interior back together after the front and rear installation is done and a test drive was taken. This way you can make adjustments if needed without removing everything again.
Step 11: The front side. Jack the front up **Jackpoints** and support the front on jackstands.
Step 12: Loosen the top mount bolts and brace bolts, but do not remove them completely.
Step 13: Remove the 2 bolts for the brake line support.
Step14: Remove the bolt for the top portion of the suspension fork
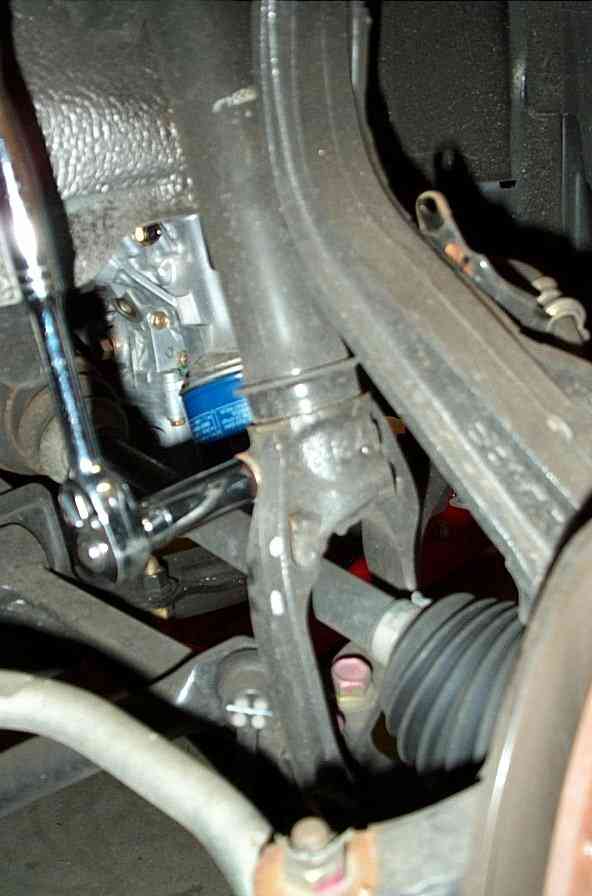
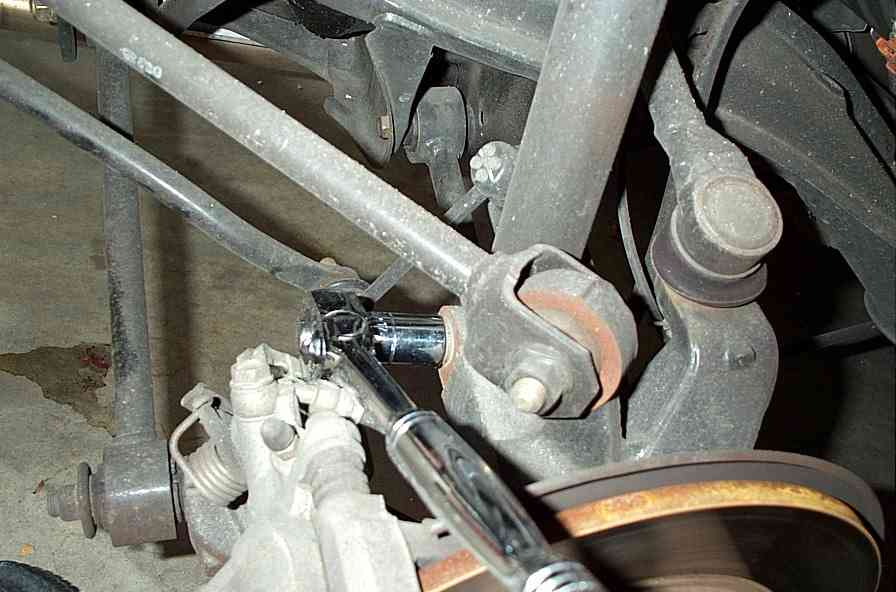
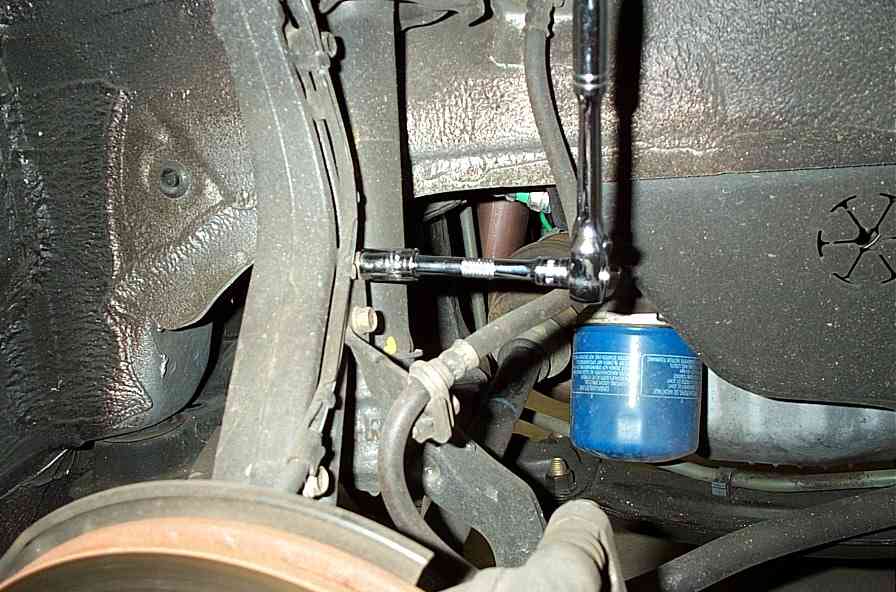
Step15: Using 2 ratchets (on both sides of the bolt/nut), remove the bolt holding the fork part of the suspension. Slide the fork off the bottom of the shock.

Step 16: Remove the bolts from the top mount. Hold the suspension (or have someone else hold it) before removing the last nut so it doesn't drop.
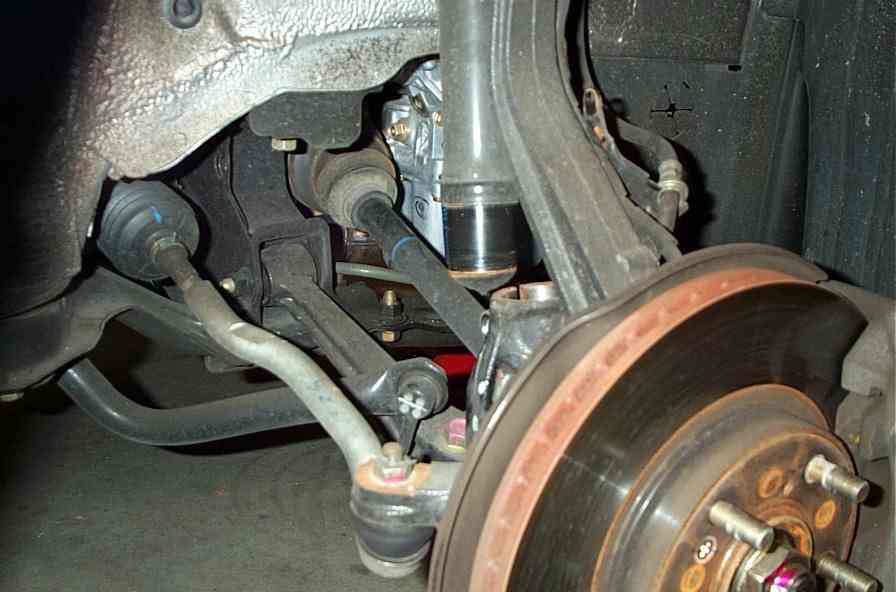
Step 17: Most likely the suspension will be difficult to remove completely. Jack the lower control arm up a little and you should be able to remove the suspension.

Step 18: **IMPORTANT - IMPORTANT - IMPORTANT** NOTE: IF YOU ARE CHANGING JUST THE SPRINGS AND PLAN ON RE-USING THE FACTORY SHOCKS, PAY CLOSE ATTENTION, OTHERWISE SKIP TO THE NEXT STEP. If you notice on the bottom of the spring perch, there are metal tabs protruding on each end. This must be perfectly aligned with the top mount when you reassemble the suspension. This is where the thin masking tape comes in. Run the masking tape straight from one of the tabs to the bottom of the shock. Next, run the masking tape across the top of the mount so when you look straight down from the top, you will see a line going straight down all the way to the bottom.
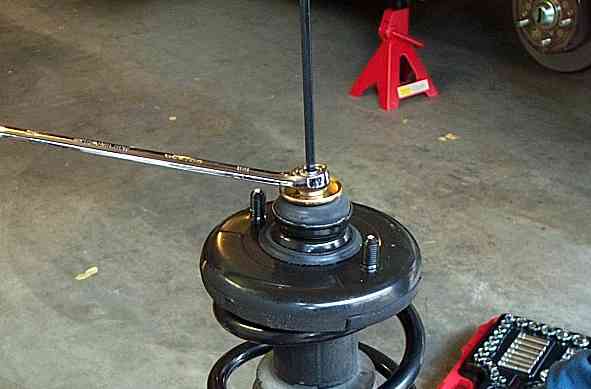
Step 19: As with the rear suspension, compress the springs and remove the top bolt holding the assembly together.
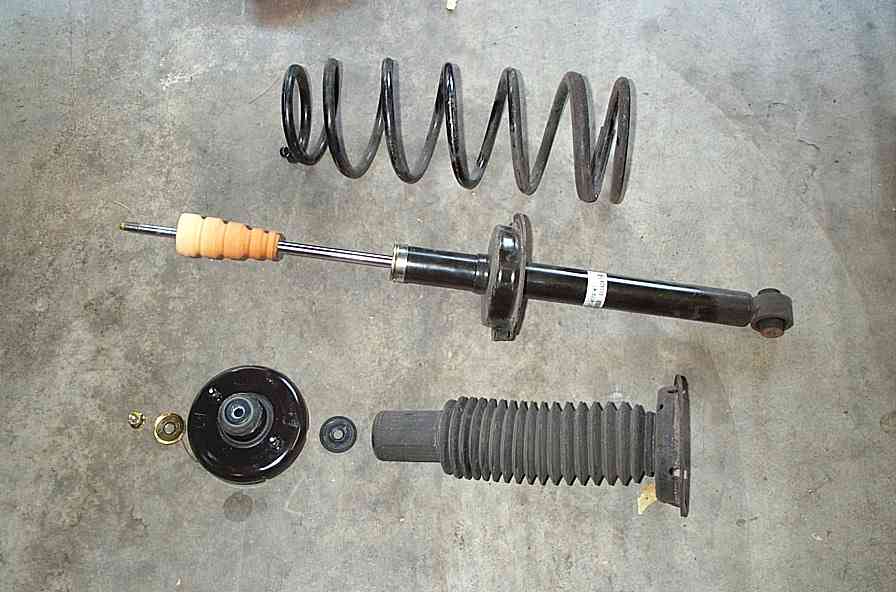
**Front suspension components**
Step 20: Reassemble everything making sure the align the top mount with the tabs on the bottom of the spring perch (masking tape). Torque specs: Bottom fork bolt - 47 ft. lbs, Top damper fork bolt - 32 ft. lbs., Top mount bolts - 37 ft. lbs, Strut brace bolts - 12 ft. lbs.