Installation: Swaybar installation guide
Swaybars can dramatically improve the handling characteristics
of your Accord. There are several aftermarket swaybars out there to choose from.
Comptech and Eibach have the larger 23mm rear swaybars for their kits. But the
favorite choice out there is cost efficient (and effective) TL-S rear swaybar
upgrade. It's very affordable and it improves the balance of heavy understeering
Accord.
Tools/Items needed: Ratchet, sockets 12mm, 14mm open
ended wrench, hex wrench, torque wrench (optional).
Step1: Jack up the rear of the vehicle and place it on jack
stands. Removing the tires isn't necessary, but it's a good option to remove
the wheels and place them under the car in front of the jackstands as a precautionary
measure.
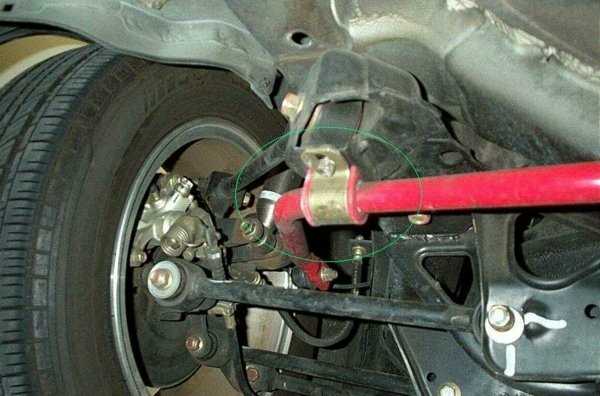
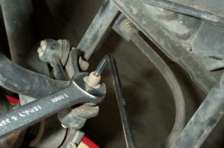
Step2: Unbolt the endlink on the swaybar side. You'll need
a hex wrench to hold the threaded ball joint still while removing the 14mm nut.
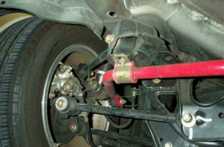
Step3: Unbolt the brackets holding the swaybar in place (12mm).
Becareful to hold the bar while removing the last bolt so that it doesn't fall
on your face.
Step4: If you're using urethane bushings, check my swaylube
link on using teflon tape in the place of silicone grease (link).
If you're using the rubber bushings for the TL-S bar, then you can apply some
silicone grease or high-pressure grease to the bushings.
Step5: Reinstall everything. The front is the same as the rear
with the exception that you'll need to maneuver the bar over the catalytic converter
to remove it.
Torque specs: Swaybar endlinks - 28 ft. lbs., swabar bracket - 16 ft. lbs
>>> Home