Installation: Rear Camber Arm
*The rear camber is usually something you have to watch out
for. When lowering a vehicle, the rear begins to camber immediately while the
front stays pretty straight until aggressive lowering is performed. Since I've
used both methods of camber correction (washers and bolts/camber arm), I posted
DIY's for both. If you're wondering which method is better; well.. honestly, both
work really well and both are solid and reliable. If you're wondering why I moved
up to the camber arm, it's because I use my car for competition. As such, I need
the availability of micro-adjustments for fine tuning.
Tools needed: Ratchet set, 14mm socket, 3/8" extention.
Step1: Loosen the lugs on the rear wheels, jack up the rear,
and place it on jack stands.
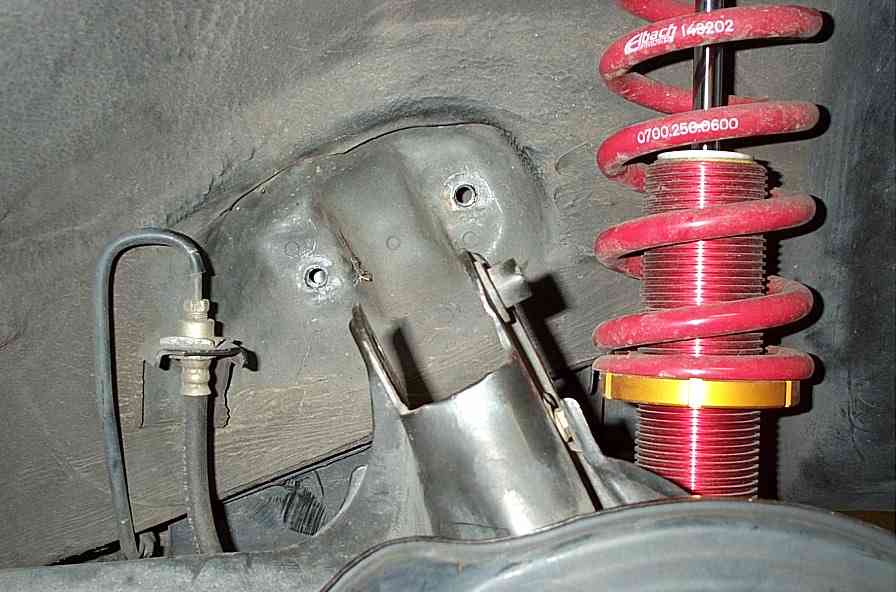
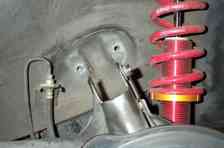
Step2: There are 3 bolts you'll need to remove to get the upper
arm out. Start with the side that's connected to the trailing arm.
Step3: Since it's hard to access, use an extention to access
the two remaining bolts. I used an 18" extention.
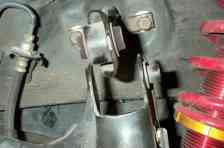
Step4: I threaded both ends of the camber arm to the shortest
length. The reason for this is when you make adjustments, you'll be spinning the
center piece. You'll want both ends threaded equally. Also, as you're installing
the arm, keep the lock nuts loose. you don't want the arm binding.
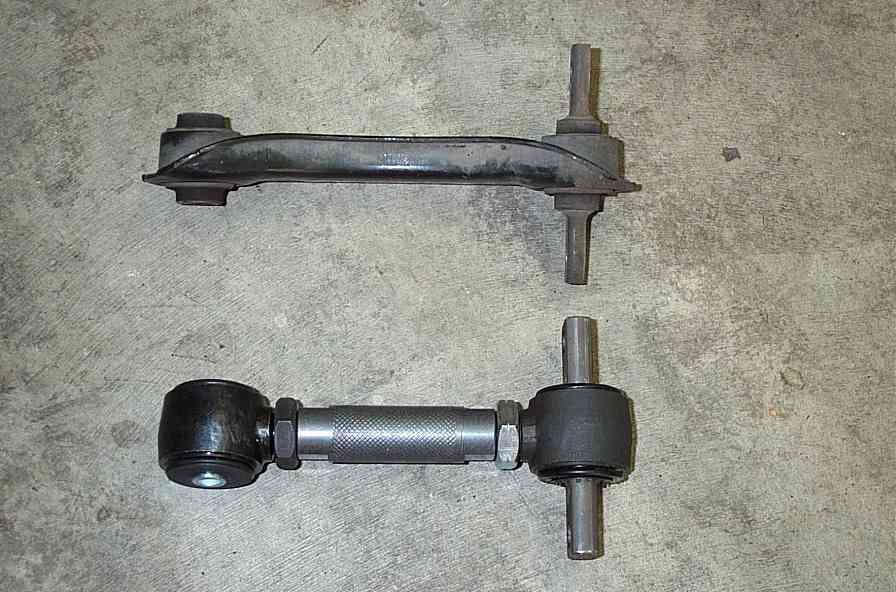
*Comparison pic of the two arms:

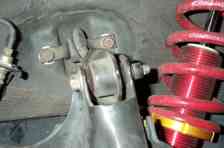
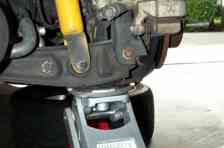
Step5: Once you have the arm installed, tighten and torque the
two bolts going into the body. Torque spec: 29 ft. lbs.
Step6: Thread in the bolt connecting to trailing arm, but don't
tighten it yet. Once the bolt is in, use a jack to raise the trailing arm to the
point that the suspension is loaded. It should almost be to the point where that
corner of the car will start coming off the jack stand. Tighten the bolt and torque
it. Torque spec: 40 ft. lbs. Lower the jack.
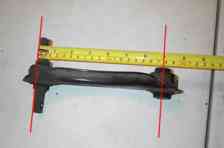
Step7: Measure the oem arm from the back of the mounting point,
to the center of the hole up front. Now you'll want to make your adjustment on
the camber arm. If you're dropped 2", a good place to start is 15mm longer
than your oem measurement. Using adjustable wrenches, tighten the lock nuts.
After a day or two of driving your car around, take it in for alignment.
*Torque Specs: Upper arm to chasis - 29 ft. lbs.; Upper arm to
trailing arm - 40 ft. lbs.; Wheel lugs - 80 ft. lbs. (84-86 ft. lbs. recommended)
>>> Home