Installation: Stainless steel braided brake hose
*Most people call them brake lines, but manufacturers refer
to them as brake hoses. So what's the concept of stainless steel braided brake
hoses? When your car is in a situation where constant or repeated hard braking
is performed, your brake fluid starts heating up considerably. At that point,
your factory rubber brake hoses soften up and expand when the brakes are applied.
When your brake hoses expand, the full pressure is not being sent to the brake
calipers to do their job at max potential. The stainless brake hoses resist expansion
and allow full pressure to be applied to the calipers.
**When upgrading to stainless steel brake hoses, you should also upgrade your
brake fluid to high performance DOT4 brake fluid (DO NOT USE DOT5!). Make
sure to look for synthetic (although most DOT4 are).
***When working on the brake hoses, it's recommended that you use latex or nirtle
gloves. Brake fluid and skin doesn't mix well.
Tools/supplies needed: Ratchet
set, torque wrench, flare nut wrench set, adjustable wrench, locking pliers, rags,
brake cleaner, open ended wrench set.
Parts needed: New crush washers for brake hoses (should
be supplied with new brake hoses). Check the -BRAKEBLEED-
page for additional supplies needed.
Step1: Raise the car on jackstands. Place the wheels in between
the jackstands for additional safety.
Step2: Open the brake fluid resovoir. Using a pump or turkey
baster, remove as much fluid as possible.
Step3: Place a catch pan or several newspapers under the area
you'll be working on. When you remove the brake line, a good amount of brake fluid
will be draining out.
Front Brakes:
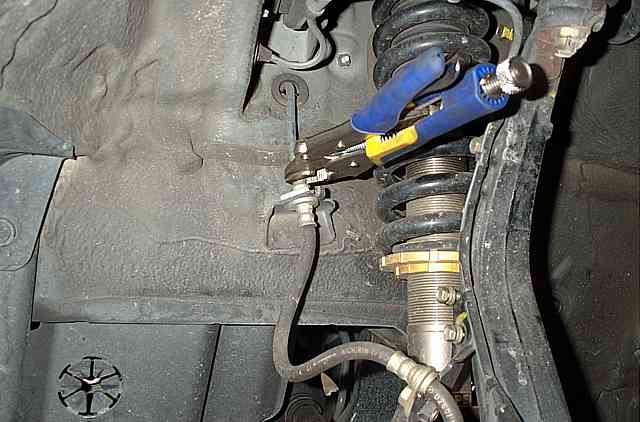
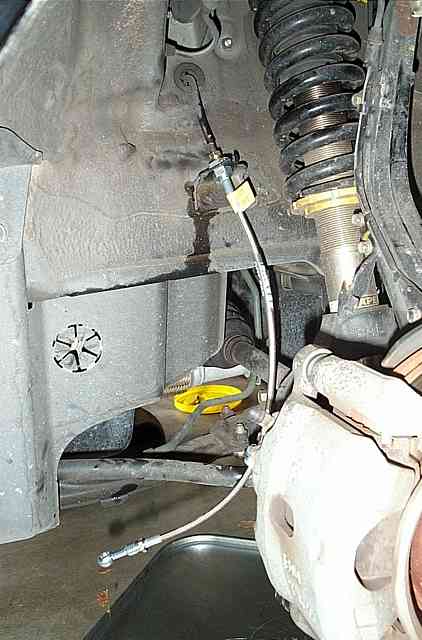
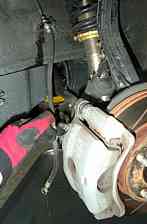
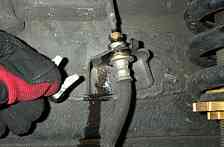
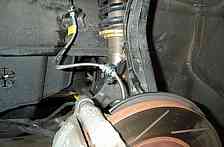
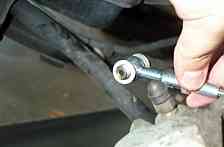
Step4: Using the 10mm flarenut wrench, loosen the top nut of
the brake hose. If you don't have a flarenut wrench, you can use locking pliers
as a substitute. Make sure it's locked tight so you don't strip the nut.
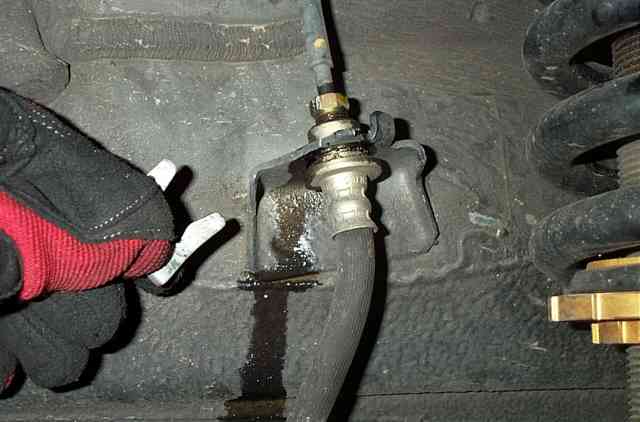
Step5: Loosen the bolt securing the hose to the bracket.
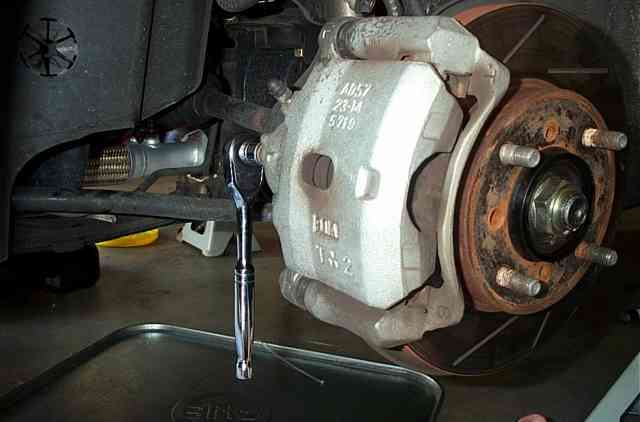
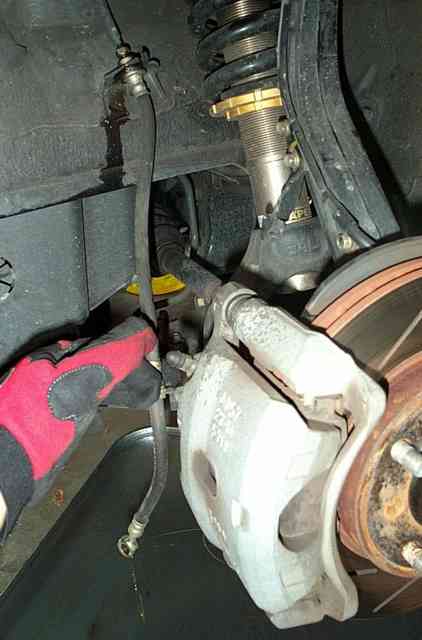
Step6: Loosen and remove the banjo bolt securing the hose to
the brake caliper.
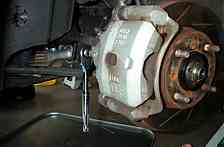
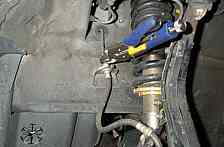
Step7:Using a big flat head screw driver, pry out the metal clip
holding the hose against the main brake line. Remove all the previous bolts/nuts
to take the complete hose off.
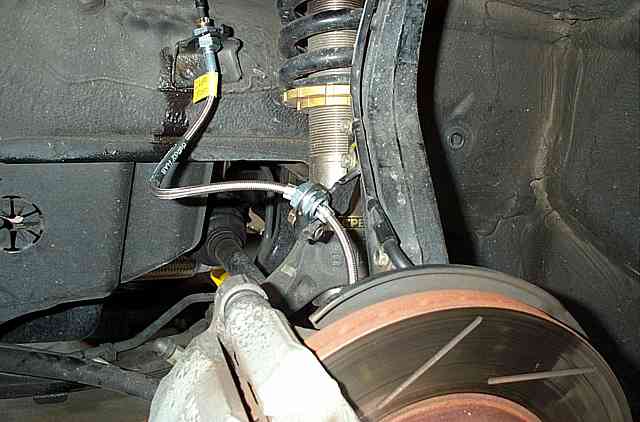
Step8: Reverse process to install the new hose. Tighten the top
nut first Decently tight, Torque spec: 11 ft. lbs.). Depending on which brand
you get, some will reuse the clip for securing, and others might use a nut instead.
If it came with a nut to secure it, make sure to put the nut between the main line
and bracket before you guide the brake hose through the bracket and into the
main line.
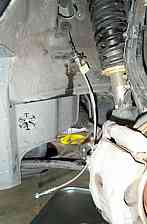
Step9: Run the hose to the bracket and caliper. Hand tighten
everything at first. This way you can check to make sure the hose is run correctly
from the main line to the caliper. You don't want the hose to be binding.
Step10: Securing the hose to the bracket might be the same as
the main line to the brake hose depending on which brand you purchase. Bolt in
the small OEM bolt first, then using adjustable wrenches, tighten the nuts on
the ss hose to the bracket. When you get to the banjo bolt, you will use TWO
crush washers. One one each side of the brakehose fitting. Torque it to spec.
The integrity of the banjo bolt isn't as strong as normal bolts due to the fluid
passages, so overtightening it will snap the bolt (Torque spec: 25 ft. lbs.)
Rear brakes
Step11: Same procedure as the front.
Step12: Once you've finished installing all the new hoses, Wipe
off any brake fluid that got onto your car, suspension parts, etc. It's
very corrosive. Next, it's
time to fill the fluid resovoir and bleed the brakes.
-Brake Bleeding DIY Link-
Step13: After a day or two, rebleed the brakes.
>>> Home